How to Flush Your Pipes for Lead
Follow these steps to flush your pipes after a lead service line replacement or disturbance.
Follow these steps to flush your pipes after a lead service line replacement or disturbance.
When a lead service line is replaced, the construction activity can loosen lead particles that break free and enter the water passing through the pipe. Other pipe disturbances can also loosen lead particles. This can include water shut-offs, bypasses, meter replacements or other repairs to the water main or water service line.
Please follow these instructions to flush lead particles out before using the water for drinking, cooking or making infant formula.
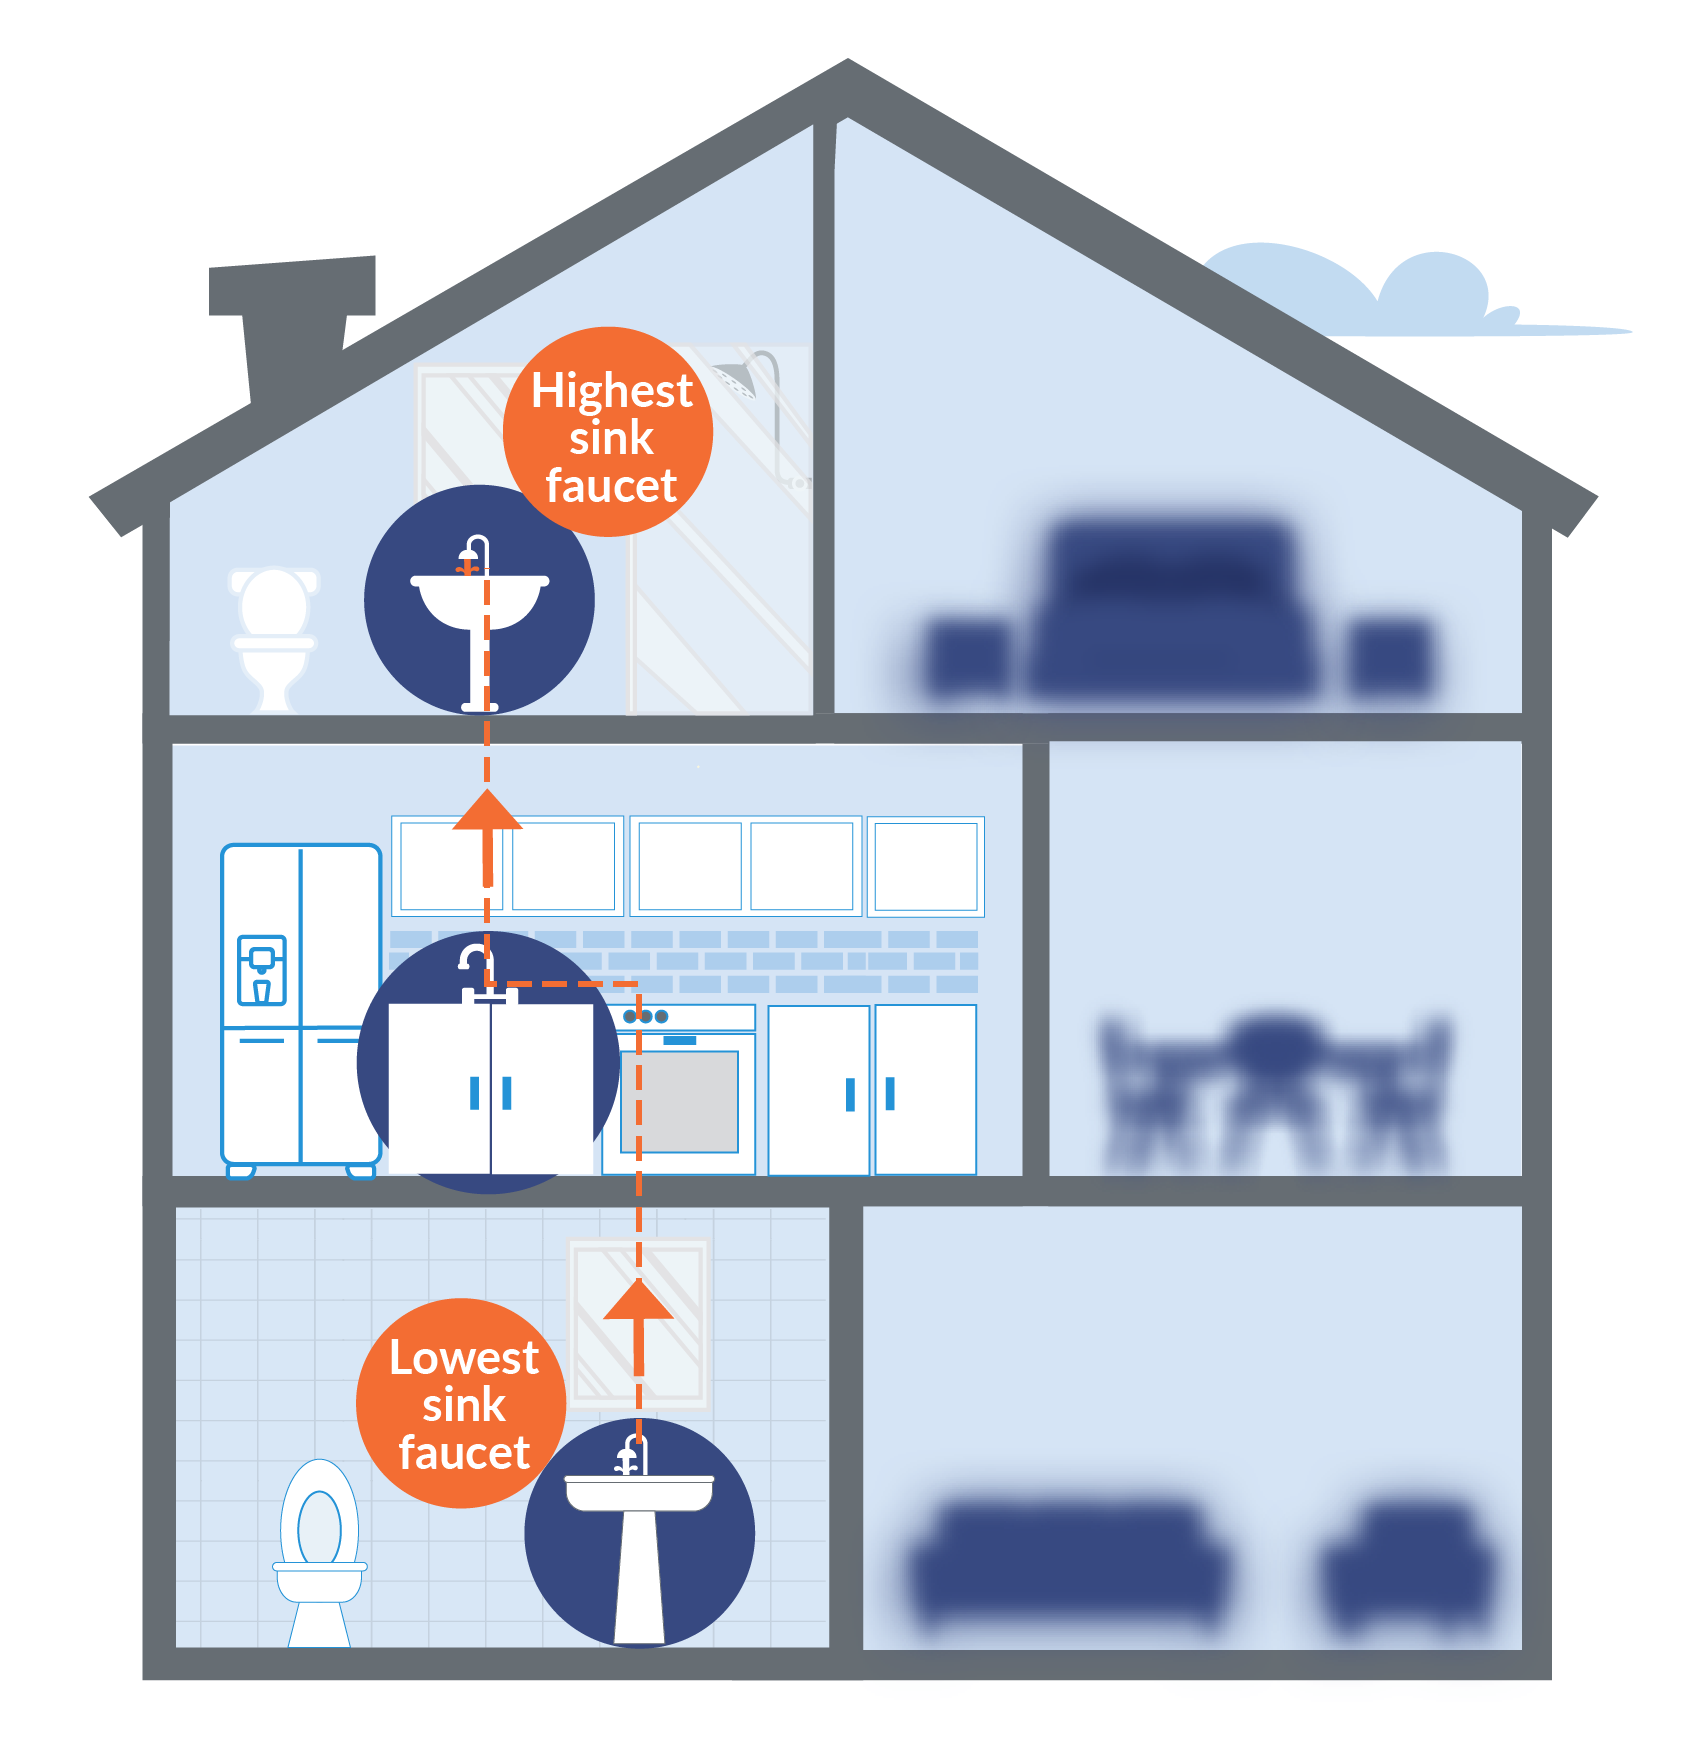
To properly flush your pipes, always start from the lowest sink faucet in your house and work your way up, running every sink in your house, until you reach the highest sink faucet.

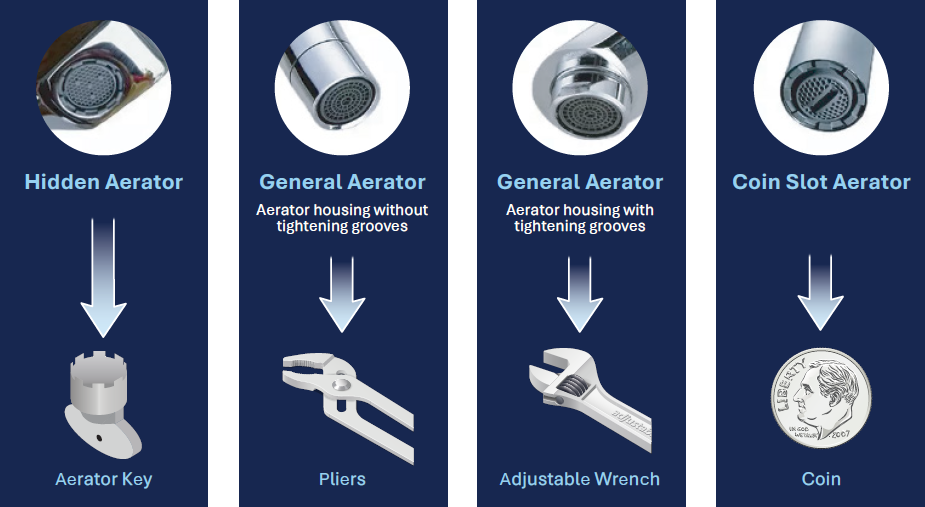
Remove aerators and screens from all faucets being flushed. Skip faucets with aerators that cannot be removed. Refer to note in the bottom-left corner.* Important: Removing aerators is essential to prevent particulates from collecting on the screen.

Start on the lowest floor of the house and open cold water taps to the highest flow rate possible. Continue to open faucets on higher floors.

After all the taps are open, leave water running and set a timer for at least 10 minutes.

Check sinks to ensure water doesn’t overflow during flushing. Important: Make sure the sink is properly draining while you run your water.

Turn off the taps in the same order they were turned on (i.e., starting from the lowest floor).

Clean and re-install aerators or replace if worn or damaged.

Please reuse flushed water for general cleaning and watering plants. Do not use it for drinking, cooking or washing dishes, countertops or other food-contact surfaces.
*If you cannot remove the aerator and screens from a faucet, do not run that specific faucet. Aerators and screens can trap lead particles. Consider replacing faucets where aerators and screens cannot be removed.